Hardware Setup
Setting up the hardware correctly is crucial to ensuring a seamless connection between your Arduino device and the iOS app via Bluetooth. This guide provides a step-by-step walkthrough to ensure the physical components are properly connected.
Understanding the Rx and Tx Pins
Rx and Tx stand for Receive and Transmit, respectively. These pins play a crucial role in serial communication:
Rx (Receive): This pin is used to receive data. For instance, if you're getting data from a Bluetooth module, it will be "received" on the Rx pin of your Arduino.
Tx (Transmit): As the name implies, this pin is used to send data. If your Arduino needs to send data to a Bluetooth module, it'll "transmit" this data from the Tx pin.
The magic happens when data flows between these pins: your Arduino's Tx pin will "speak" to the Rx pin on your Bluetooth chip, and vice versa.
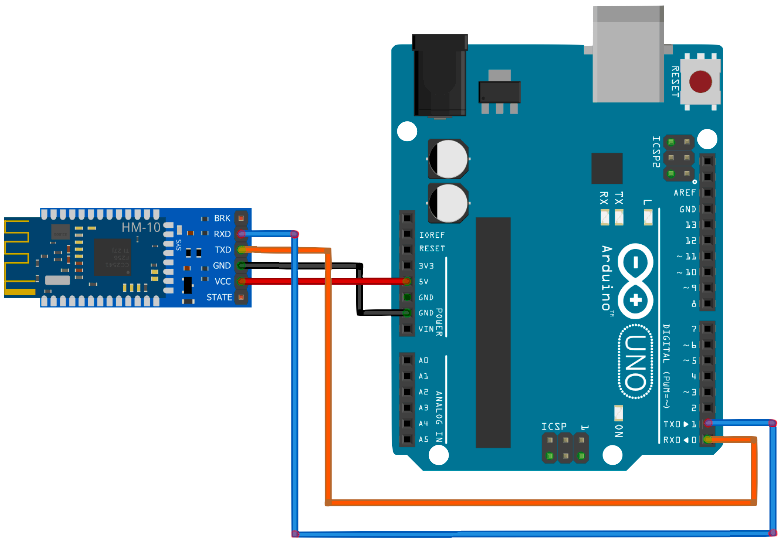
Connecting Your HM10 Bluetooth Chip
Follow these steps to connect your HM10 Bluetooth chip to the Arduino:
Identify the Rx and Tx pins on your Arduino: Check the labeling on your Arduino board. The Rx and Tx pins are often labeled as 0 and 1, respectively.
Connect the Rx pin of your Bluetooth module to the Tx pin (1) of your Arduino.
Connect the Tx pin of your Bluetooth module to the Rx pin (0) of your Arduino.
By connecting in this crisscross manner, you ensure the transmit pin of one device talks to the receive pin of the other, facilitating a two-way communication.
Always double-check to ensure you've connected the pins to the correct ports. Incorrect port connections can lead to malfunctions or even damage your devices.
A Note on Built-In Ports
Most Arduino boards have built-in Rx and Tx ports, but these are often utilized by the board for uploading code and serial monitor communication. Thus, using these for Bluetooth communication can cause conflicts, especially when uploading new sketches to your board.
The SoftwareSerial library comes to the rescue! With this library, you can use almost any digital pins as Rx and Tx, avoiding conflicts with the built-in ports.
Wrapping Up
With your Bluetooth chip correctly connected to your Arduino, you're all set on the hardware front. Remember, a robust connection is foundational to everything else we'll build upon, so always ensure your wiring is accurate and secure.